Self-Balancing Sea Lion
May 202611 min read
- Creo Parametric
- Mechatronics
- PID Control
- 3D Printing
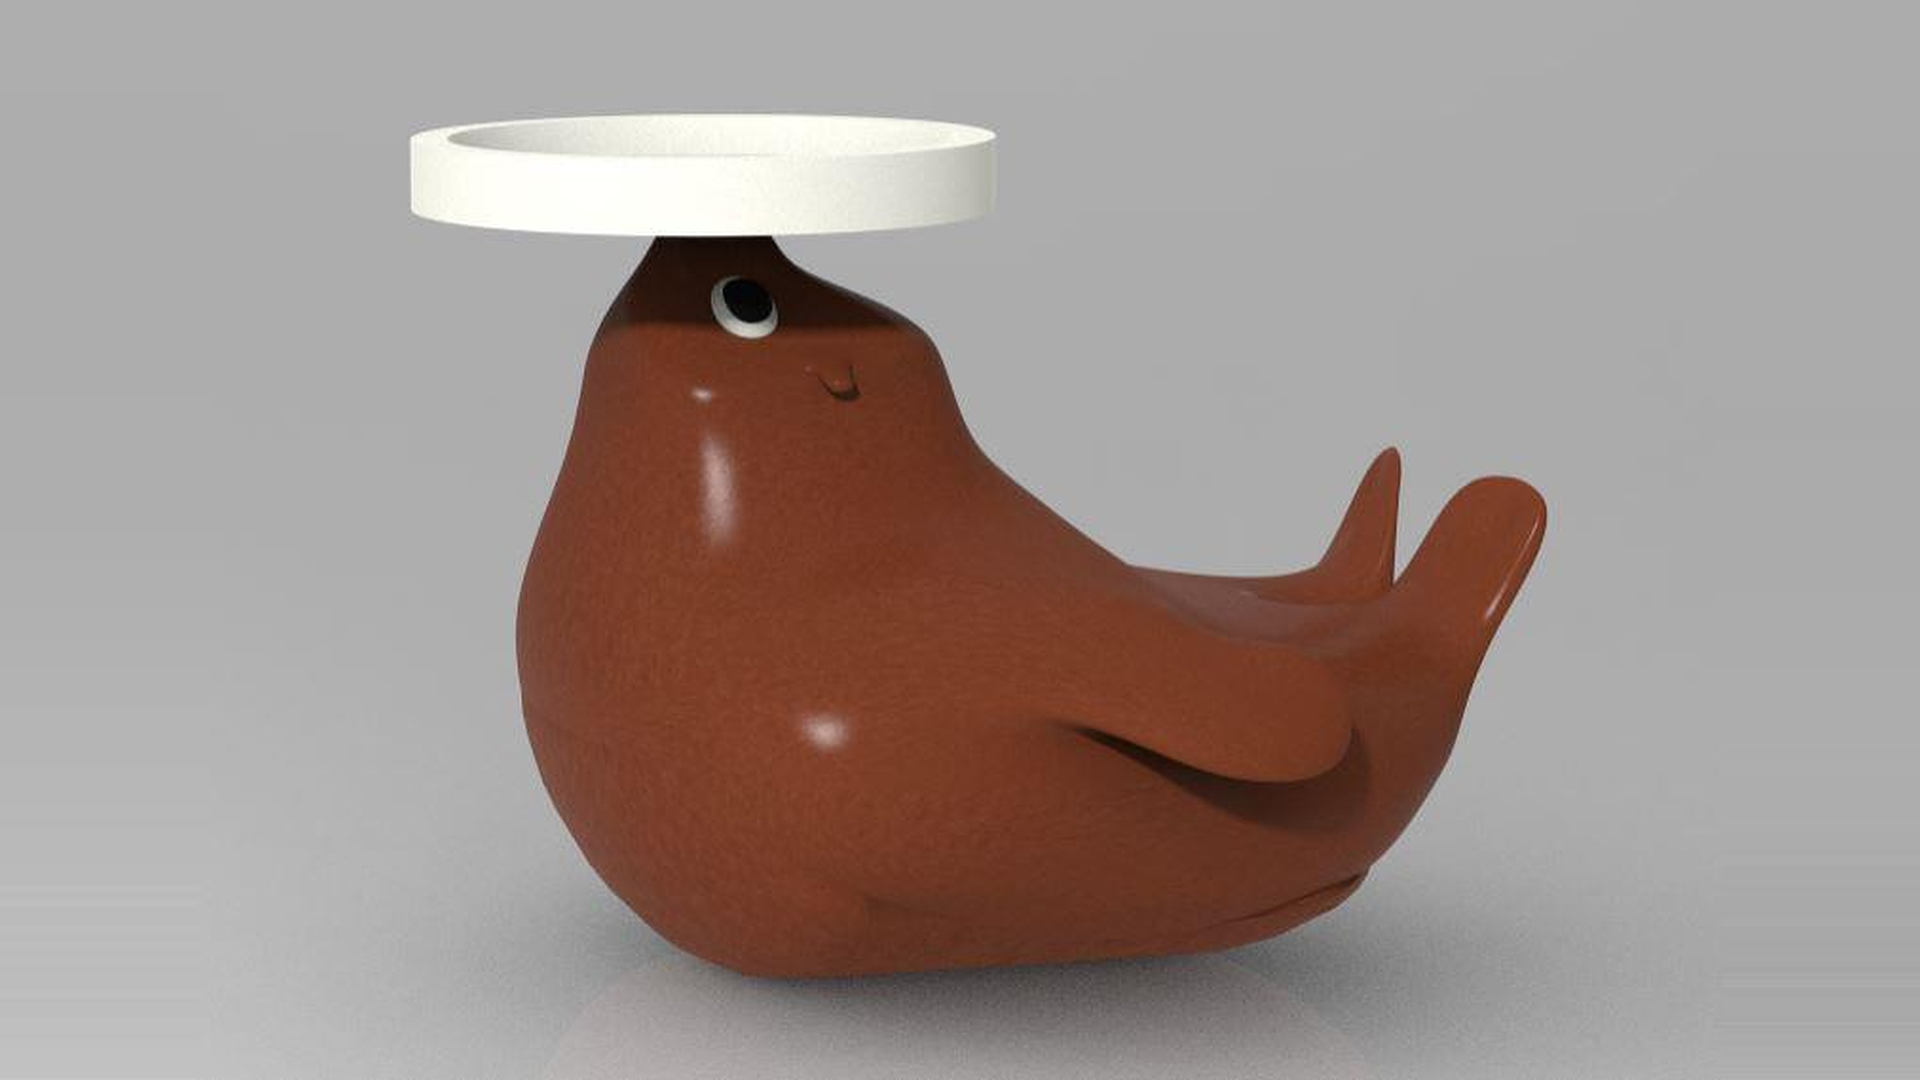
In a team of four, we built a sea lion that balances objects on his nose. I owned the capstan drive and the electronics-to-mechanical integration. Cadding and electronics packaging were shared.
- Inverted pendulum control: a BNO055 IMU reads tilt at 100 Hz, an Arduino Nano runs PID, and a 4:1 Dyneema capstan swings a 2 lb hammer head against the tilt.
- PID tuned on hardware: gyro-fed D term, anti-windup, deadbands.
- Creo surface modeling: boundary blends over a cylindrical belly, mechanism animated in CAD to catch interferences.
- All four requirements passed: at least one non-trivial mechanism, recovery faster than the free wobble, re-leveling with ~200 g, sealed but serviceable electronics.
Without the loop closed, this toy just wobbles. With it closed, it fights back!
Context
Final project for ME 444, Computer Aided Design and Prototyping (Spring 2026). The end product was an action toy with at least one non-trivial mechanism, inside a 12 x 12 x 12 inch envelope and a $70 budget. We built a sea lion that balances things on his nose. He has wanted to join the circus since he was a pup!
Cuteness alone was not enough. Our team set three more goals:
- Recover from a push faster than his natural uncontrolled wobble.
- Return upright with a ~200 g object placed at the edge of his plate.
- Keep the electronics sealed away from the player, but easy to open for maintenance.
How It Works
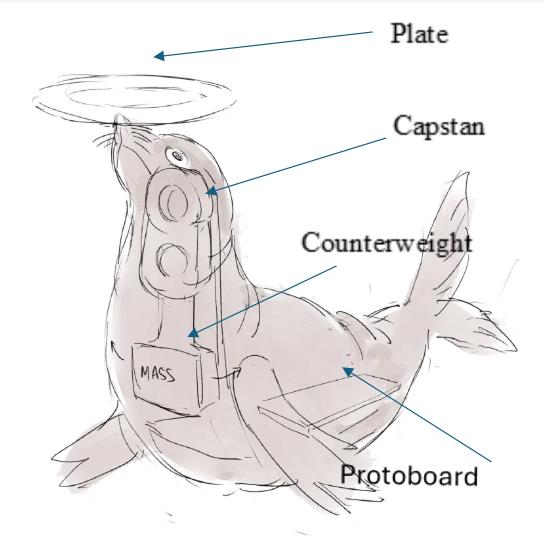
Under the fur, this is a one-degree-of-freedom inverted pendulum, a broomstick balanced on your palm that can only tip one way. The body rocks on a perfectly cylindrical bottom. Inside, a counterweight swings to cancel whatever the world does to him.
- Sense. A BNO055 IMU reads the tilt angle 100 times a second over I2C, doing the job a real sea lion’s inner ear does for free!
- Compute. An Arduino Nano runs a PID loop on that tilt error.
- Actuate. A servo rated for 25 kg-cm of stall torque spins a helical screw. A Dyneema cable winds a capstan drum for a 4:1 reduction.
- Counterbalance. The drum swings a 2 lb hammer head opposite the tilt. Yes, a real hammer head. More on that later.
The heart of the control loop fits in three lines:
float error  = event.orientation.y;                  // tilt from the IMU
float u = P*error + I*integral_error + D*gyro.y();   // gyro feeds the D term directly
myservo.write(constrain(u + 90 + error*GEAR_RATIO, 0, 180)); // 90 = level, x4 keeps the arm world-frame
Those gains only mean something if you know what you are fighting. Sum torques about the line where the belly meets the table. The whole equation of motion condenses to this:
Take the terms left to right. Rotational inertia resists angular acceleration. Gravity re-centers a center of mass hanging a distance below the belly’s center of curvature. The counterweight of mass swings to angle on an arm of radius . The last term is whatever torque the world adds.
Two insights fell out of this napkin model:
- The counterweight works twice. Shift it slowly and the center of mass moves, letting gravity level the body out. Accelerate it hard and it trades angular momentum with the body, kicking the sea lion upright like a reaction wheel. Both effects scale with mass, which is why the jump from 1 lb to 2 lb transformed the response.
- The passive system is stable but barely damped. Left alone, the sea lion wobbles for ages. So every gain got a physical job. D supplies the missing damping, P sets how hard he fights a tilt, and the I term trims out the steady lean when a weight parks at the edge of the plate.
In code, the D term reads angular rate straight off the gyro instead of differentiating a noisy angle. Anti-windup stops the integral from ballooning when the servo saturates. Deadbands keep the sea lion from twitching when he is already level. Final gains landed at , , . We tuned them through trial, error, and a lot of pushing the sea lion over. Be assured that no sea lions were harmed in the production of this toy!
Design Choices
- Capstan drive over a direct-drive arm. The first prototype bolted a 1 lb weight straight to a servo arm. The body geometry wasted most of the servo’s 180-degree range. The capstan’s 4:1 reduction trades range for torque. Full servo travel becomes a short, forceful swing that actually fits inside a sea lion.
- Dyneema cable. Compared to printed gears, it has low creep and near-zero backlash, the bit of slop you feel before a gear train starts pulling. Helical grooves cut into the screw keep it from slipping once tensioned.
- A perfectly circular belly. Early bodies had a tighter bottom curve. On a small tilt, the servo physically could not pull the body back. A larger circular profile widened the recoverable range. An ellipse made the dynamics messier than we had time for. The circle won.
- A hammer head for a heart. Iteration one used a 1 lb fishing weight that could not reject step disturbances, and the 2 lb replacement we ordered never shipped. So we sawed the head off a $9 hardwood engineer’s hammer and reprinted the capstan with a socket to hold it. Two pounds, already on the shelf.
Building It
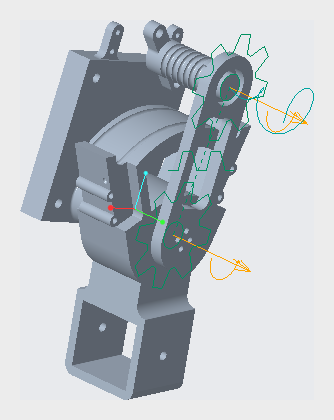
Every structural component is PLA, modeled in Creo Parametric. The body was our excuse to try free-hand surface modeling. Boundary blends, the Creo tool that stretches a smooth skin across a set of guide curves, wrap over the cylindrical bottom. The sea lion looks organic and still rocks predictably. Modeling the capstan screw as a gear with a helical sweep let us animate the whole mechanism in CAD and catch interferences before printing a single part.
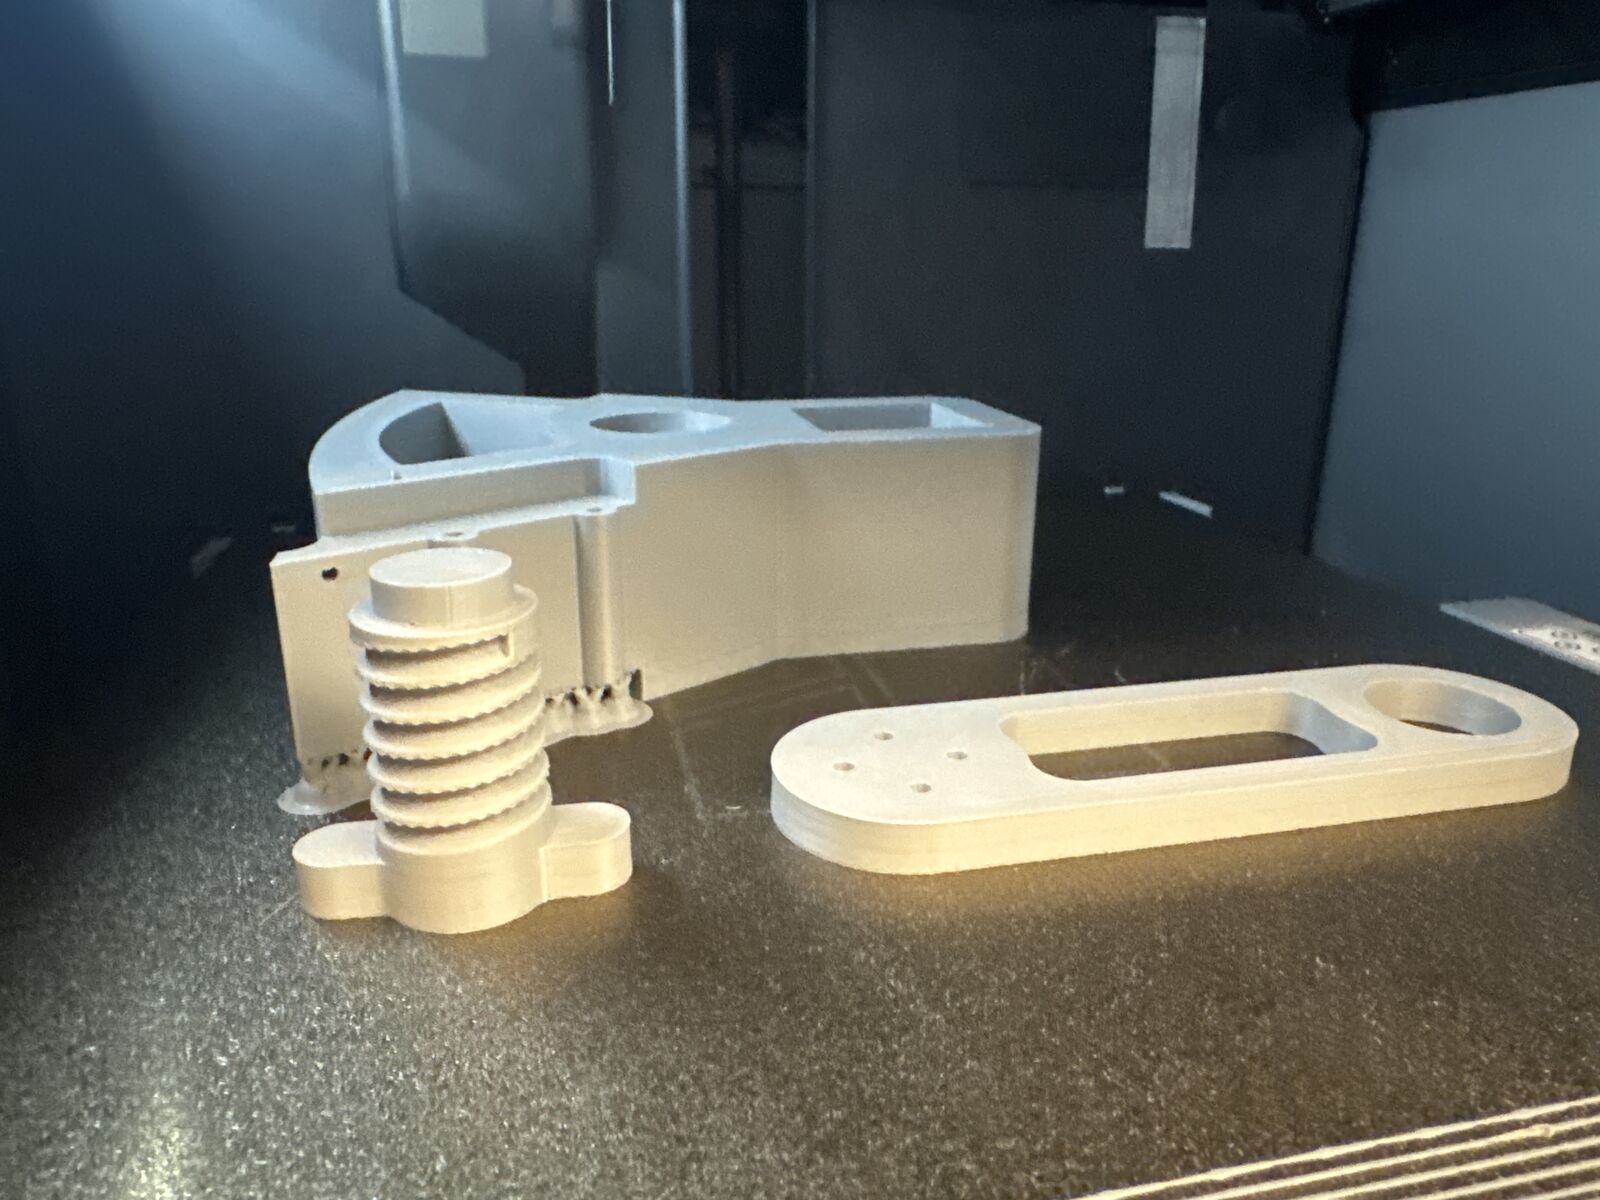
The build itself was a crash course in design for assembly:
- Too big for the print bed, the body halves were sliced into sections, glued, and sanded flat where the seams warped.
- A dovetail joint on the internal frame makes reassembly self-locating.
- Heat set inserts and M3 screws let the servo, capstan, and protoboard drop out cleanly for maintenance.
- The head plate and body shells snap-fit together, so the electronics stay sealed but reachable.
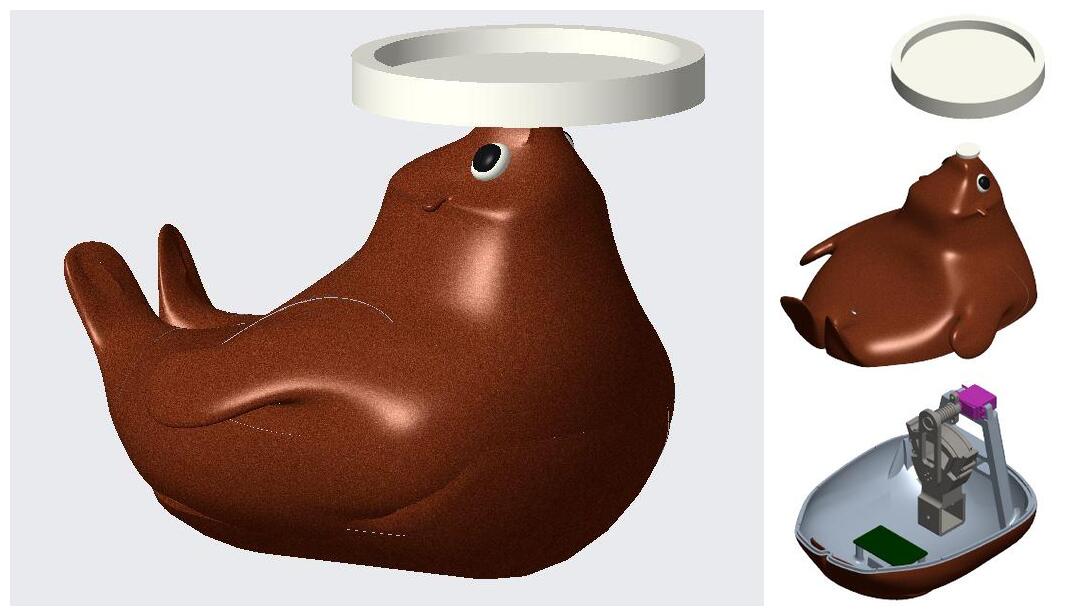 The final CAD assembly and its exploded view. Plate, top shell, and the bottom shell carrying the whole mechanism.
Power comes from a 2S LiPo, a 7.4V battery pack. A buck converter steps it down to 6V for the servo. The Nano takes the full 7.4V on Vin. The IMU runs off the Nano’s 5V pin. Everything lives on a protoboard at the bottom of the cavity. The board conveniently doubles as ballast.
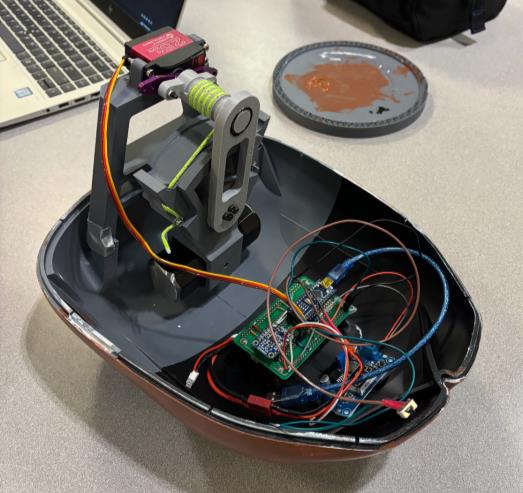
Shell open, loop closed, and a little jittery. We tuned every gain with the full shell installed. With the top half off, the body is lighter and carries less rotational inertia. The same corrections come on too strong and the capstan twitches around level. PID gains are married to the exact body they were tuned on.
Results
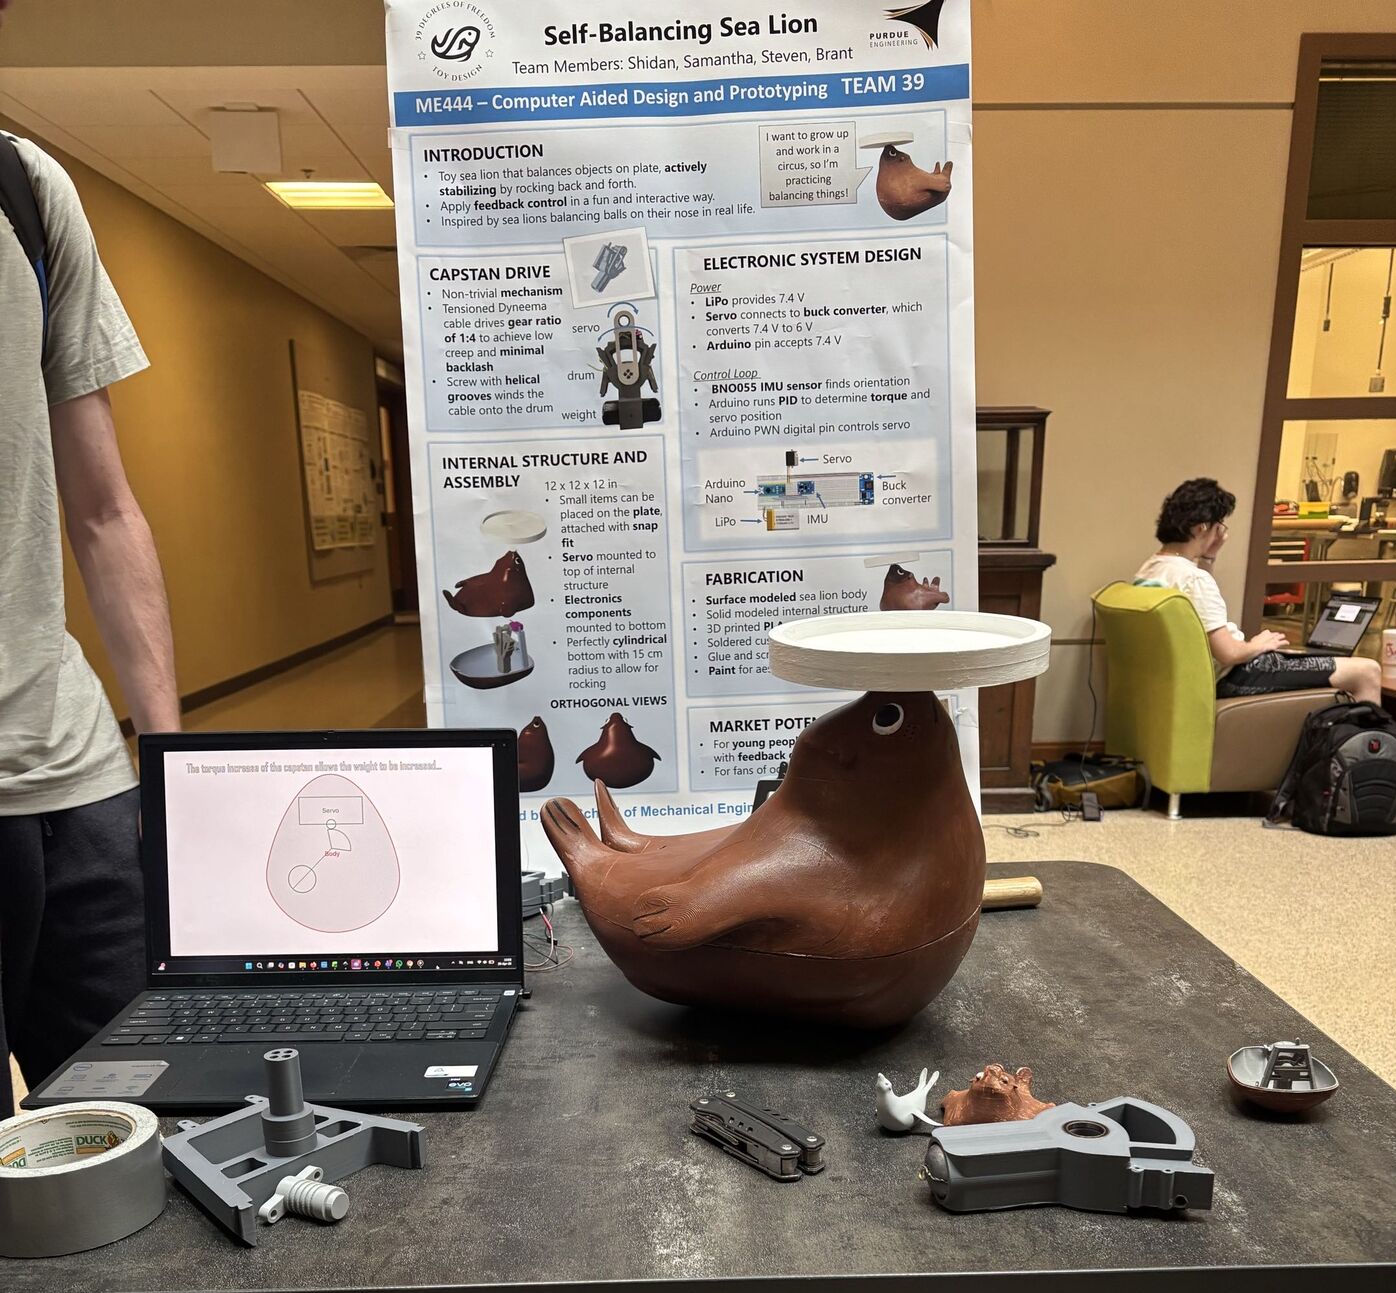
The sea lion works! Push him and he pops back upright faster than the free wobble. Stack a weight on the edge of his plate and the hammer head quietly slides the other way until he levels out. The side-by-side tests in our final video say it better than I can:
Made with the rest of the team. Shout out to Shidan Wan, Samantha Walz, and Brant Peng.
| Requirement | Outcome | |
|---|---|---|
| Non-trivial mechanism | Custom capstan drive, 4:1 reduction | |
| Recover from a push faster than the free response | PID actively damps it instead of letting it ring | |
| Re-balance with ~200 g at the plate edge | Counterweight shifts and he settles upright | |
| Electronics secured but serviceable | Snap-fit shell, heat set inserts, M3 screws |
What I’d Change Next Time
- A faster servo and longer capstan travel. The mechanics set the settling time, which no amount of tuning shortens.
- Analytical PID tuning from a real plant model. We shoved the toy and turned knobs because we ran out of time.
- A proper counterweight mount. Handy dandy duct tape is holding it right now.
The Ultimate Takeaway
The closed loop is what makes the sea lion fight back. Servos saturate. Loops have latency. Neither shows up in a block diagram. But wind a cable around a 3D-printed screw, swing a hammer head, and let PID do the rest. The sea lion balances. The circus should be calling any day now!